In the previous lesson we introduced the ColorPicker component.
Now we put that component to good use. When the user clicks the button we’ll change the default color of the application. This will be in turn used in the next lesson when we’ll allow to color pixels by clicking with the mouse.
Define the color storage location
First, let’s define a default color in the App state to ‘white’.
In src/App.vue we define the data object, which is a function that returns an object that contains the color property:
export default {
  name: 'App',
  data: function() {
    return {
      color: 'white'
    }
  },
  //...
}
Note: it’s important that you defined
dataas a function that returns an object, not just an object.
Now we pass this property to the ColorPicker component in the template, as a prop:
<ColorPicker :color=color />
We need to use :color here because the color is a dynamic value, stored in the component data.
Now inside the ColorPicker component, in src/components/ColorPicker.vue, we add the props object that defines the color prop as a string:
export default {
  name: 'ColorPicker',
  props: {
    color: String
  },
  //...
}
Cool! Now we can check if it works by printing it inside the template using {{color}}.
Done?
Let each Pixel know if it’s the currently selected color
Now we can pass a current prop, a boolean value that is true if the color assigned to the pixel is the current color.
Inside the ColorPicker component, we look up the color prop in the template, and we use the ternary operator to assign a true/false value to the current prop:
<template>
  <div>
    <Pixel color="white" :current="color == 'white' ? true : false"/>
    <Pixel color="lightblue" :current="color == 'lightblue' ? true : false"/>
    <Pixel color="blue" :current="color == 'blue' ? true : false" />
    <Pixel color="darkblue" :current="color == 'darkblue' ? true : false" />
  </div>
</template>
We don’t pass down the color value to the Pixel component, because it does not need to know about it.
So now inside Pixel, we accept that prop:
<script>
export default {
  name: 'Pixel',
  props: {
    color: String,
    current: Boolean
  }
}
</script>
and we assign a current class to the pixel that has that assigned to true:
<template>
  <div :class="['pixel', color, current ? 'current' : '']"></div>
</template>
and we add a line of styling to the Pixel style tag:
.pixel.current {
  border: 4px solid yellow;
}
Select a new color when clicked
Now when a Pixel component in the ColorPicker is clicked, we must update the currently selected color.
How do we do such a thing? We need to use events.
Vue has a very nice mechanism to handle events. For a simple use case like ours, it’s ideal.
We listen for a particular event name, and then we emit this event when something happens.
Now, let’s start with emitting the event.
In src/components/Pixel.vue we add a click handler. Whenever this element is clicked, we trigger a brand new changeColor method we add to Pixel. in the component methods property:
<template>
  <div @click="changeColor(color)" :class="['pixel', color, current ? 'current' : '']" ></div>
</template>

<script>
export default {
  name: 'Pixel',
  //...
  methods: {
    changeColor: function(color) {
      this.$root.$emit('updatecolor', color)
    }
  }
}
</script>
The body of the changeColor method looks up the $root element (the main Vue component) and triggers an updatecolor event, passing color which is the color prop that is passed down to Pixel.
The other side of this mechanism is the event receiver.
We set it up in the App component.
We add a mounted property to the App component, which is a callback function that’s called when the component is added to the page. In this case, when the application starts at page load.
//...
mounted() {
  this.$root.$on('updatecolor', color => {
    this.color = color
  })
}
//...
We use mounted() instead of mounted: function mounted() because this is a handy shortcut that ES6 provides us.
The callback function starts listening for the updatecolor event and accepts a color parameter. When it’s invoked, we set the color property of the component data to the newly selected color.
We use this.$root because events must be referenced on the same Vue instance. In both components, we refer to the root vue instance as an event bus - a way to exchange events.
Here’s the full App component script at this point:
<script>
import Canvas from './components/Canvas'
import ColorPicker from './components/ColorPicker'

export default {
  name: 'App',
  data: function() {
    return {
      color: 'white'
    }
  },
  components: {
    Canvas,
    ColorPicker
  },
  mounted() {
    this.$root.$on('updatecolor', color => {
      this.color = color
    })
  }
}
</script>
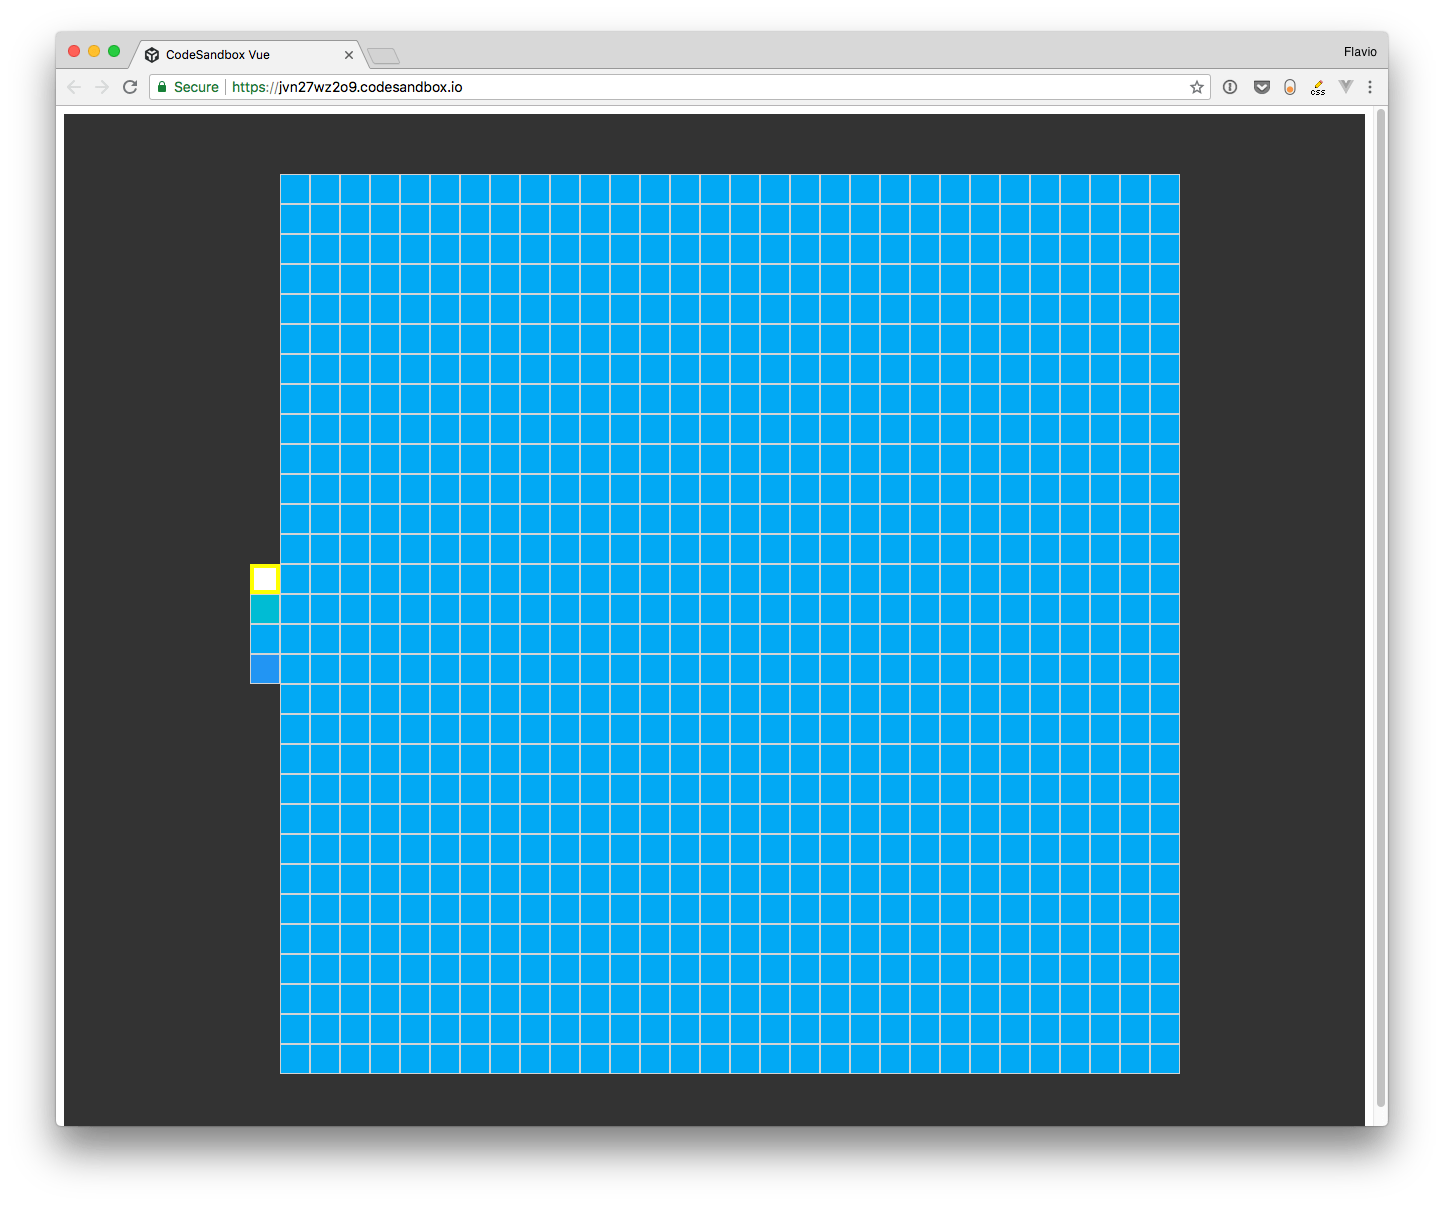
Play around and notice how you can click the ColorPicker pixels and what happens now is that the current prop is updated every time they send the event to update the color, and so they are highlighted when you click them.
The full source at this point is available at https://codesandbox.io/s/jvn27wz2o9.
⚠️ There’s one thing though. We don’t want every pixel in the Canvas to be able to change the color when clicked. This is what’s happening right now! 😱
So what can we do in this case? One option is to tell the Pixel if it is interactive, and only, in this case, it will emit the event.
Sounds good, let’s do it!
In ColorPicker.vue we add an interactive prop to each Pixel:
<template>
  <div>
    <Pixel interactive color="white" :current="color == 'white' ? true : false"/>
    <Pixel interactive color="lightblue" :current="color == 'lightblue' ? true : false"/>
    <Pixel interactive color="blue" :current="color == 'blue' ? true : false" />
    <Pixel interactive color="darkblue" :current="color == 'darkblue' ? true : false" />
  </div>
</template>
and in Pixel.vue we list it in the accepted props:
<script>
export default {
  name: 'Pixel',
  props: {
    color: String,
    current: Boolean,
    interactive: Boolean
  },
  //...
}
</script>
Now we only want to emit the event if interactive is true.
We do so by prepending interactive && in the click event handler:
<template>
  <div @click="interactive && changeColor(color)" :class="['pixel', color, current ? 'current' : '']" ></div>
</template>
what this code means is “if interactive is true, then call changeColor(color)”. It’s a rather terse JavaScript construct, but it is much simpler to read than a full-blown if statement once you get the hang of it 🙂
We could have checked this in the changeColor method body, but not calling it in the first place sounds better to me.
Now you can go and check that only the Pixel components in the ColorPicker trigger the color change.
We’re almost done, except the app looks quite bad right now. Adding this CSS in the App.vue file will make it a bit better, with the ColorPicker on the left rather than on top:
background-color: #333;
display: flex;
justify-content: center;
align-items: center;
height: 100vh;
Here’s our result so far!
Wrapping up
In this lesson, probably the most complex of this module, you first added a centralized place to store the current color in the App component.
Then you set up an event system to handle changing the color when a Pixel in the ColorPicker is clicked.
Let’s go to the next lesson to start coloring the pixels in the canvas!